How to create a product launch video with Remotion
Build a 12 second, four scene product launch video in Remotion: scaffold, fonts, one React component per scene, Studio, stills and a real render. Every file and command was run on Remotion 4.0.533.
A launch video has to get a stranger to understand what your product does in about ten seconds. This tutorial builds one from an empty folder with Remotion, the React framework for making video in code. You will write every file, run the real commands and end with a rendered MP4.
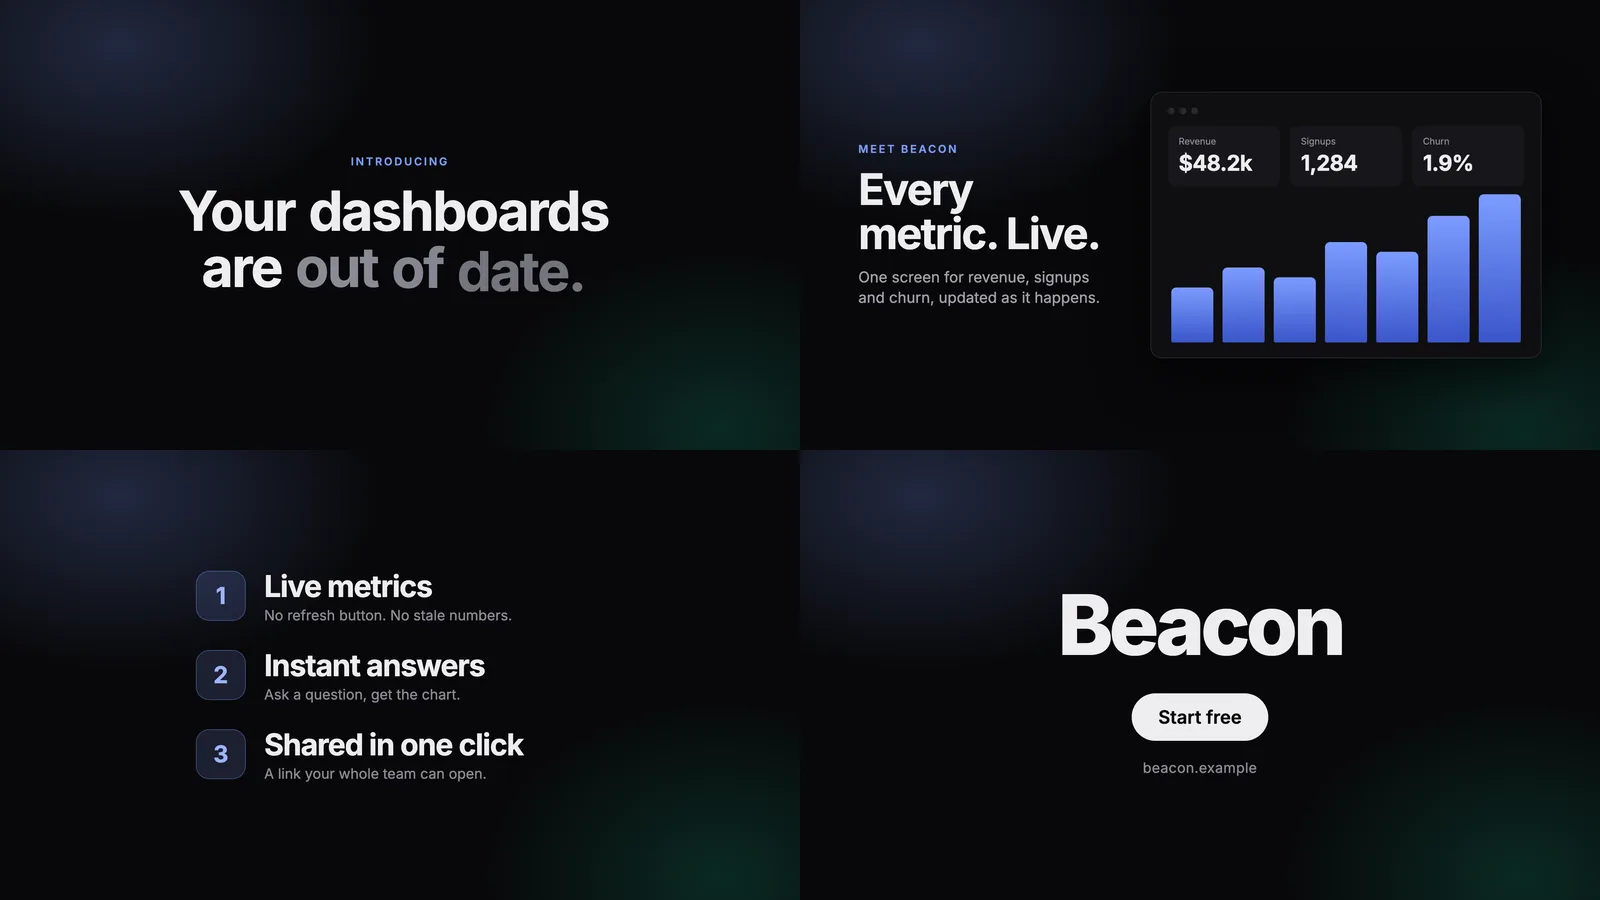
Everything below was run on Remotion 4.0.533 with Node.js 22, on a Mac. The product, Beacon, is made up, and the video needs no images or footage: every visual is a React component. It is the same video as in the HyperFrames version of this tutorial, so you can compare the two approaches directly.
What you need
- Node.js 22 or newer.
- A terminal and a code editor. React knowledge helps; the components here are plain function components with inline styles.
Remotion downloads the browser it renders with, so there is nothing else to install.
Step 1: plan four scenes
Decide the scenes first, because the code mirrors them. Remotion measures time in frames, so write the plan in both units. At 30 frames per second:
| Scene | Starts at | Length | What it says |
|---|---|---|---|
| Hook | frame 0 (0.0s) | 93 frames (3.1s) | "Your dashboards are out of date." |
| Reveal | frame 84 (2.8s) | 114 frames (3.8s) | "Every metric. Live." beside the product |
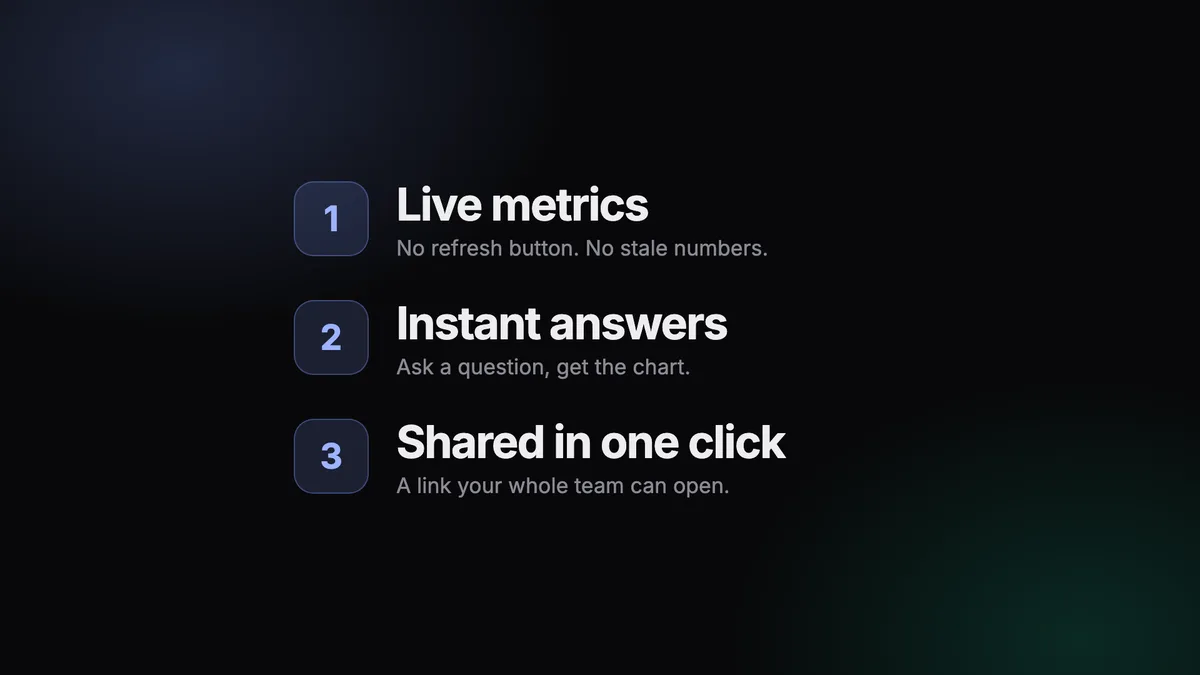
| Features | frame 192 (6.4s) | 90 frames (3.0s) | Three short promises |
| Call to action | frame 273 (9.1s) | 87 frames (2.9s) | "Beacon. Start free." |
Each scene overlaps the next by 9 frames (0.3 seconds) so they cross-fade. The whole video is 360 frames, 12 seconds. For the content side, see what makes a good launch video.
Step 2: create the project
npx create-video@latest --yes --blank --no-tailwind remotion-launch
cd remotion-launch
--yes makes it non-interactive, --blank picks the empty template, and --no-tailwind skips the Tailwind setup. It installs dependencies and finishes with:
Copied to remotion-launch.

Get started by running:
 cd remotion-launch
 npm run dev

To render a video, run:
 npx remotion render

Remotion is free for teams of up to 3.
Adopting Remotion in your company? Visit https://www.remotion.pro/license
The blank template has src/index.ts (which calls registerRoot()), src/Root.tsx and a placeholder composition. We will replace the placeholder.
Step 3: load the font
Install Remotion's Google Fonts package. Keep it on the same version as the rest of Remotion; here that is 4.0.533:
npm i @remotion/google-fonts@4.0.533
Then create src/theme.ts. It loads Inter once, in one module, and holds the colours and the two animation helpers every scene uses:
import { loadFont } from "@remotion/google-fonts/Inter";
import { Easing, interpolate } from "remotion";

// Load one weight range, once, in one module. Remotion waits for the font
// before it captures a frame, so there is nothing to delayRender yourself.
export const { fontFamily } = loadFont("normal", {
  weights: ["400", "600", "700", "800"],
  subsets: ["latin"],
});

export const colors = {
  bg: "#08080a",
  text: "#ededef",
  muted: "#8b8b95",
  accent: "#7c9cff",
};

/** 0 to 1 over `duration` frames starting at `start`, eased out. */
export const enter = (frame: number, start: number, duration: number) =>
  interpolate(frame, [start, start + duration], [0, 1], {
    extrapolateLeft: "clamp",
    extrapolateRight: "clamp",
    easing: Easing.out(Easing.cubic),
  });

/** 1 until the last `fade` frames of a scene, then 0. */
export const fadeOut = (frame: number, durationInFrames: number, fade = 9) =>
  interpolate(frame, [durationInFrames - fade, durationInFrames], [1, 0], {
    extrapolateLeft: "clamp",
    extrapolateRight: "clamp",
  });
loadFont() blocks the render until the font is ready, so you do not need to call delayRender() yourself. enter() turns a frame number into a 0 to 1 progress with easing, and fadeOut() does the same for the last few frames of a scene. Everything is built from interpolate().
Step 4: register the composition
Replace src/Root.tsx with a single composition that fixes the canvas: 1920 by 1080, 30 fps, 360 frames. Delete the template's src/Composition.tsx.
import { Composition } from "remotion";
import { Launch } from "./Launch";

export const RemotionRoot: React.FC = () => (
  <Composition id="Launch" component={Launch} durationInFrames={360} fps={30} width={1920} height={1080} />
);
Step 5: assemble the scenes, src/Launch.tsx
Launch paints the background and places each scene with a <Sequence>. Inside a sequence, useCurrentFrame() starts at zero when the sequence starts, so each scene animates against its own local time.
import { AbsoluteFill, Sequence } from "remotion";
import { colors, fontFamily } from "./theme";
import { Features } from "./scenes/Features";
import { Intro } from "./scenes/Intro";
import { Outro } from "./scenes/Outro";
import { Reveal } from "./scenes/Reveal";

// 30 fps. Each scene overlaps the next by 9 frames (0.3s) so the fades cross.
const SCENES = {
  intro: { from: 0, duration: 93 },
  reveal: { from: 84, duration: 114 },
  features: { from: 192, duration: 90 },
  outro: { from: 273, duration: 87 },
} as const;

export const Launch: React.FC = () => (
  <AbsoluteFill
    style={{
      fontFamily,
      color: colors.text,
      background: `radial-gradient(900px 600px at 15% 10%, rgba(124,156,255,0.22), transparent 70%),
        radial-gradient(800px 600px at 90% 95%, rgba(22,245,189,0.14), transparent 70%), ${colors.bg}`,
    }}
  >
    <Sequence from={SCENES.intro.from} durationInFrames={SCENES.intro.duration}>
      <Intro durationInFrames={SCENES.intro.duration} />
    </Sequence>
    <Sequence from={SCENES.reveal.from} durationInFrames={SCENES.reveal.duration}>
      <Reveal durationInFrames={SCENES.reveal.duration} />
    </Sequence>
    <Sequence from={SCENES.features.from} durationInFrames={SCENES.features.duration}>
      <Features durationInFrames={SCENES.features.duration} />
    </Sequence>
    <Sequence from={SCENES.outro.from} durationInFrames={SCENES.outro.duration}>
      <Outro />
    </Sequence>
  </AbsoluteFill>
);
All four timing values live in the SCENES table. To make the hook a second longer, change one number here rather than editing animation code in the scene.
Step 6: the hook, src/scenes/Intro.tsx
import { AbsoluteFill, useCurrentFrame } from "remotion";
import { colors, enter, fadeOut } from "../theme";

// Two lines, so the break is data rather than a <br /> in the middle of the animation.
const LINES = [
  [{ text: "Your" }, { text: "dashboards" }],
  [{ text: "are" }, { text: "out", muted: true }, { text: "of", muted: true }, { text: "date.", muted: true }],
];

export const Intro: React.FC<{ durationInFrames: number }> = ({ durationInFrames }) => {
  const frame = useCurrentFrame(); // local to this <Sequence>: 0 at the scene's first frame
  const label = enter(frame, 3, 15);
  let index = 0; // running word number across both lines, for the stagger

  return (
    <AbsoluteFill
      style={{
        alignItems: "center",
        justifyContent: "center",
        textAlign: "center",
        gap: 36,
        opacity: fadeOut(frame, durationInFrames),
      }}
    >
      <div
        style={{
          fontSize: 26,
          letterSpacing: "0.18em",
          textTransform: "uppercase",
          color: colors.accent,
          fontWeight: 600,
          opacity: label,
          transform: `translateY(${(1 - label) * 20}px)`,
        }}
      >
        Introducing
      </div>
      <h1 style={{ fontSize: 132, lineHeight: 1.02, letterSpacing: "-0.035em", fontWeight: 700, margin: 0 }}>
        {LINES.map((line, l) => (
          <div key={l}>
            {line.map((word) => {
              const p = enter(frame, 8 + index++ * 4, 18); // 4 frames between words
              return (
                <span
                  key={word.text}
                  style={{
                    display: "inline-block",
                    marginRight: "0.25em",
                    color: word.muted ? colors.muted : colors.text,
                    opacity: p,
                    transform: `translateY(${(1 - p) * 60}px)`,
                  }}
                >
                  {word.text}
                </span>
              );
            })}
          </div>
        ))}
      </h1>
    </AbsoluteFill>
  );
};
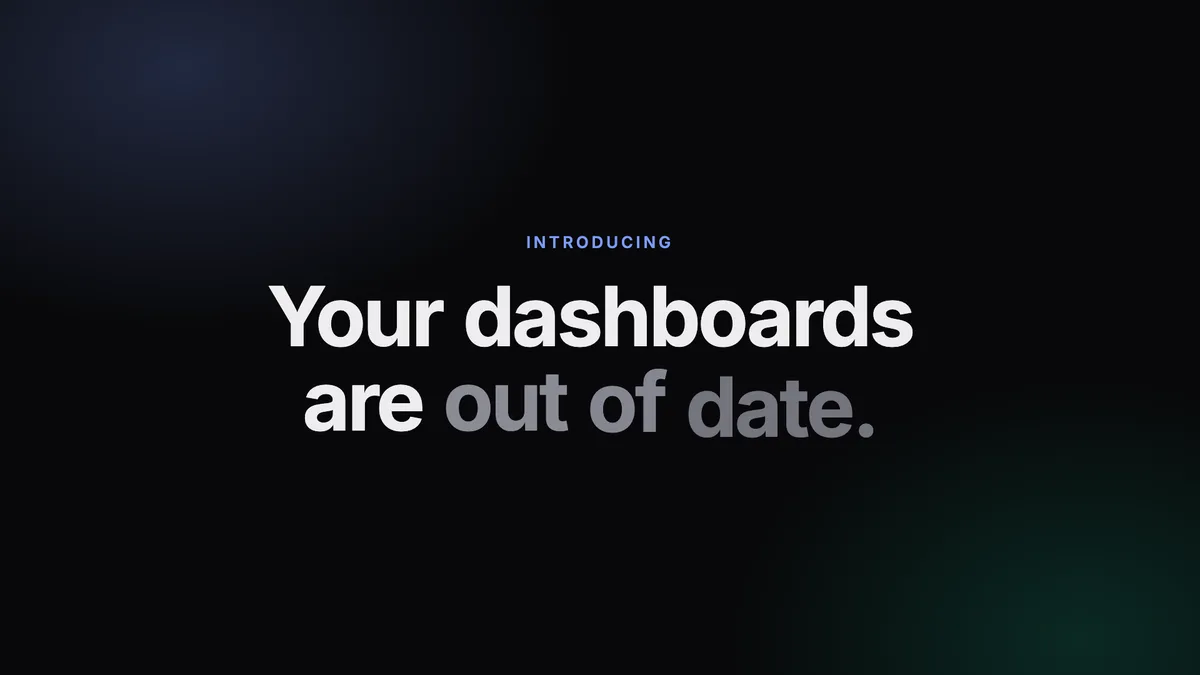
Notice that nothing here uses a timer, Date.now() or CSS transitions. Every value is a pure function of frame: given frame 36, the component always draws the same picture. That is what makes Remotion renders reproducible, and it is why the word stagger is written as arithmetic (8 + index * 4 frames) rather than as a delay. See why a render can differ from its preview for the principle.
Step 7: the reveal, src/scenes/Reveal.tsx
The longest scene: copy on the left, a dashboard built from plain div elements on the right, KPI tiles that rise in, and bars that grow from the baseline.
import { AbsoluteFill, Easing, interpolate, useCurrentFrame } from "remotion";
import { colors, enter, fadeOut } from "../theme";

const KPIS = [
  { label: "Revenue", value: "$48.2k" },
  { label: "Signups", value: "1,284" },
  { label: "Churn", value: "1.9%" },
];
const BARS = [38, 52, 45, 68, 60, 82, 96];

export const Reveal: React.FC<{ durationInFrames: number }> = ({ durationInFrames }) => {
  const frame = useCurrentFrame();
  const dash = enter(frame, 12, 24);

  return (
    <AbsoluteFill
      style={{
        flexDirection: "row",
        alignItems: "center",
        padding: "0 140px",
        gap: 90,
        opacity: fadeOut(frame, durationInFrames),
      }}
    >
      <div style={{ width: 640, display: "flex", flexDirection: "column", gap: 28 }}>
        {[
          <div key="e" style={{ fontSize: 26, letterSpacing: "0.18em", textTransform: "uppercase", color: colors.accent, fontWeight: 600 }}>Meet Beacon</div>,
          <h2 key="h" style={{ fontSize: 104, lineHeight: 1.02, letterSpacing: "-0.035em", fontWeight: 700, margin: 0 }}>Every metric. Live.</h2>,
          <p key="p" style={{ fontSize: 36, lineHeight: 1.35, color: "#a1a1aa", margin: 0 }}>One screen for revenue, signups and churn, updated as it happens.</p>,
        ].map((el, i) => {
          const p = enter(frame, 6 + i * 4, 18);
          return (
            <div key={i} style={{ opacity: p, transform: `translateX(${(1 - p) * -40}px)` }}>
              {el}
            </div>
          );
        })}
      </div>

      <div
        style={{
          width: 980,
          height: 640,
          borderRadius: 28,
          background: "#0f0f12",
          border: "2px solid rgba(255,255,255,0.1)",
          boxShadow: "0 40px 120px rgba(0,0,0,0.6)",
          padding: "36px 40px",
          display: "flex",
          flexDirection: "column",
          gap: 28,
          opacity: dash,
          transform: `translateY(${(1 - dash) * 80}px) scale(${0.96 + dash * 0.04})`,
        }}
      >
        <div style={{ display: "flex", gap: 12 }}>
          {[0, 1, 2].map((d) => (
            <span key={d} style={{ width: 16, height: 16, borderRadius: "50%", background: "#2a2a31" }} />
          ))}
        </div>
        <div style={{ display: "flex", gap: 24 }}>
          {KPIS.map((k, i) => {
            const p = enter(frame, 27 + i * 3, 15);
            return (
              <div key={k.label} style={{ flex: 1, background: "#17171b", borderRadius: 18, padding: "24px 26px", opacity: p, transform: `translateY(${(1 - p) * 24}px)` }}>
                <div style={{ fontSize: 22, color: colors.muted }}>{k.label}</div>
                <div style={{ fontSize: 52, fontWeight: 700, letterSpacing: "-0.02em", marginTop: 8 }}>{k.value}</div>
              </div>
            );
          })}
        </div>
        <div style={{ flex: 1, display: "flex", alignItems: "flex-end", gap: 22, padding: "0 8px" }}>
          {BARS.map((h, i) => {
            const grow = interpolate(frame, [36 + i * 2, 57 + i * 2], [0, 1], {
              extrapolateLeft: "clamp",
              extrapolateRight: "clamp",
              easing: Easing.out(Easing.back(1.4)),
            });
            return (
              <div
                key={i}
                style={{
                  flex: 1,
                  height: `${h}%`,
                  borderRadius: "12px 12px 4px 4px",
                  background: "linear-gradient(180deg, #7c9cff, #3a55c9)",
                  transformOrigin: "50% 100%",
                  transform: `scaleY(${grow})`,
                }}
              />
            );
          })}
        </div>
      </div>
    </AbsoluteFill>
  );
};
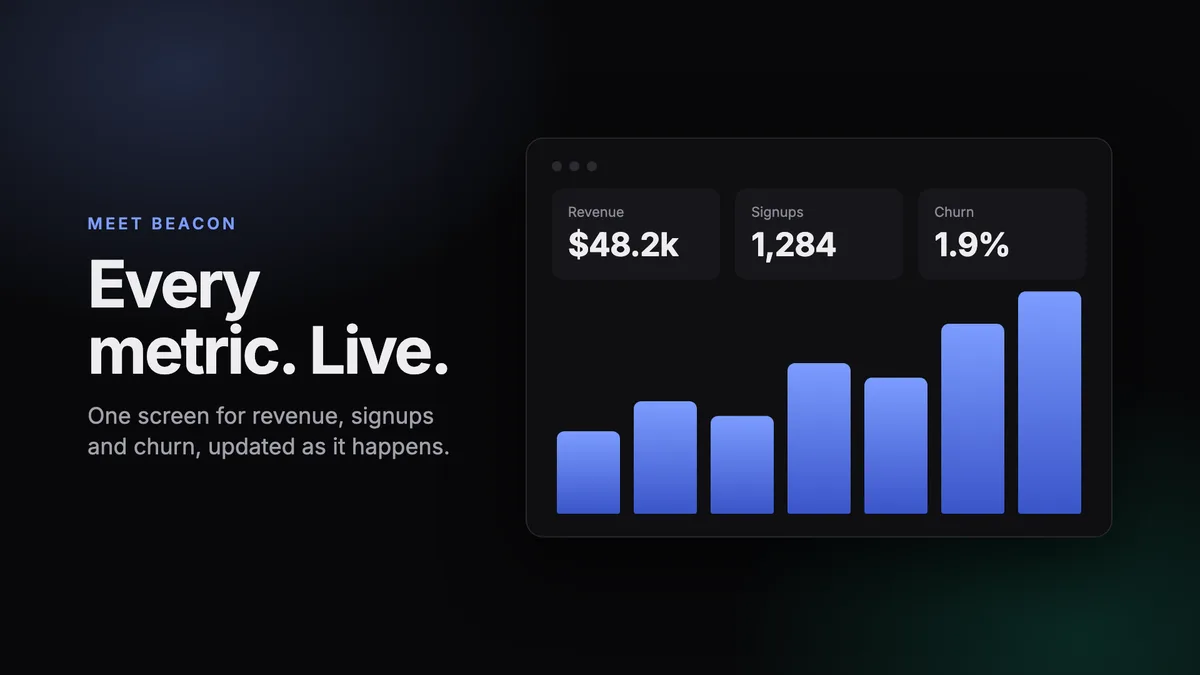
The bars animate scaleY from the baseline rather than height, which keeps layout out of the animation, and use Easing.back for the small overshoot at the top of the move.
Step 8: the features, src/scenes/Features.tsx
import { AbsoluteFill, useCurrentFrame } from "remotion";
import { colors, enter, fadeOut } from "../theme";

const ROWS = [
  { n: "1", title: "Live metrics", sub: "No refresh button. No stale numbers." },
  { n: "2", title: "Instant answers", sub: "Ask a question, get the chart." },
  { n: "3", title: "Shared in one click", sub: "A link your whole team can open." },
];

export const Features: React.FC<{ durationInFrames: number }> = ({ durationInFrames }) => {
  const frame = useCurrentFrame();

  return (
    <AbsoluteFill style={{ alignItems: "center", justifyContent: "center", gap: 56, opacity: fadeOut(frame, durationInFrames) }}>
      {ROWS.map((r, i) => {
        const p = enter(frame, 6 + i * 10, 18); // a row every 10 frames
        return (
          <div key={r.n} style={{ display: "flex", alignItems: "center", gap: 44, width: 980, opacity: p, transform: `translateX(${(1 - p) * -60}px)` }}>
            <div
              style={{
                width: 120,
                height: 120,
                borderRadius: 32,
                display: "grid",
                placeItems: "center",
                fontSize: 56,
                fontWeight: 700,
                background: "rgba(124,156,255,0.16)",
                color: "#9db3ff",
                border: "2px solid rgba(124,156,255,0.35)",
              }}
            >
              {r.n}
            </div>
            <div>
              <div style={{ fontSize: 72, fontWeight: 650, letterSpacing: "-0.03em" }}>{r.title}</div>
              <div style={{ fontSize: 34, color: colors.muted, marginTop: 6 }}>{r.sub}</div>
            </div>
          </div>
        );
      })}
    </AbsoluteFill>
  );
};
Step 9: the call to action, src/scenes/Outro.tsx
import { AbsoluteFill, useCurrentFrame } from "remotion";
import { colors, enter } from "../theme";

export const Outro: React.FC = () => {
  const frame = useCurrentFrame();
  const brand = enter(frame, 6, 21);
  const cta = enter(frame, 24, 15);
  const url = enter(frame, 33, 15);

  return (
    <AbsoluteFill style={{ alignItems: "center", justifyContent: "center", gap: 44, textAlign: "center" }}>
      <div style={{ fontSize: 200, fontWeight: 800, letterSpacing: "-0.05em", opacity: brand, transform: `scale(${0.9 + brand * 0.1})` }}>Beacon</div>
      <div
        style={{
          fontSize: 44,
          fontWeight: 600,
          color: colors.bg,
          background: colors.text,
          padding: "30px 64px",
          borderRadius: 999,
          opacity: cta,
          transform: `translateY(${(1 - cta) * 30}px)`,
        }}
      >
        Start free
      </div>
      <div style={{ fontSize: 34, color: colors.muted, letterSpacing: "0.02em", opacity: url }}>beacon.example</div>
    </AbsoluteFill>
  );
};
The last scene takes no durationInFrames and has no fade-out: it is the end of the video, so it simply holds.

Step 10: typecheck
npx tsc --noEmit
No output means no errors. The template also has npm run lint, which runs ESLint and tsc together. Typechecking matters more in video than it looks: a misspelled prop in a scene you only reach at second nine is a failure you would otherwise find at the end of a render.
Step 11: preview in Remotion Studio
npm run dev
This runs remotion studio and opens it in your browser.
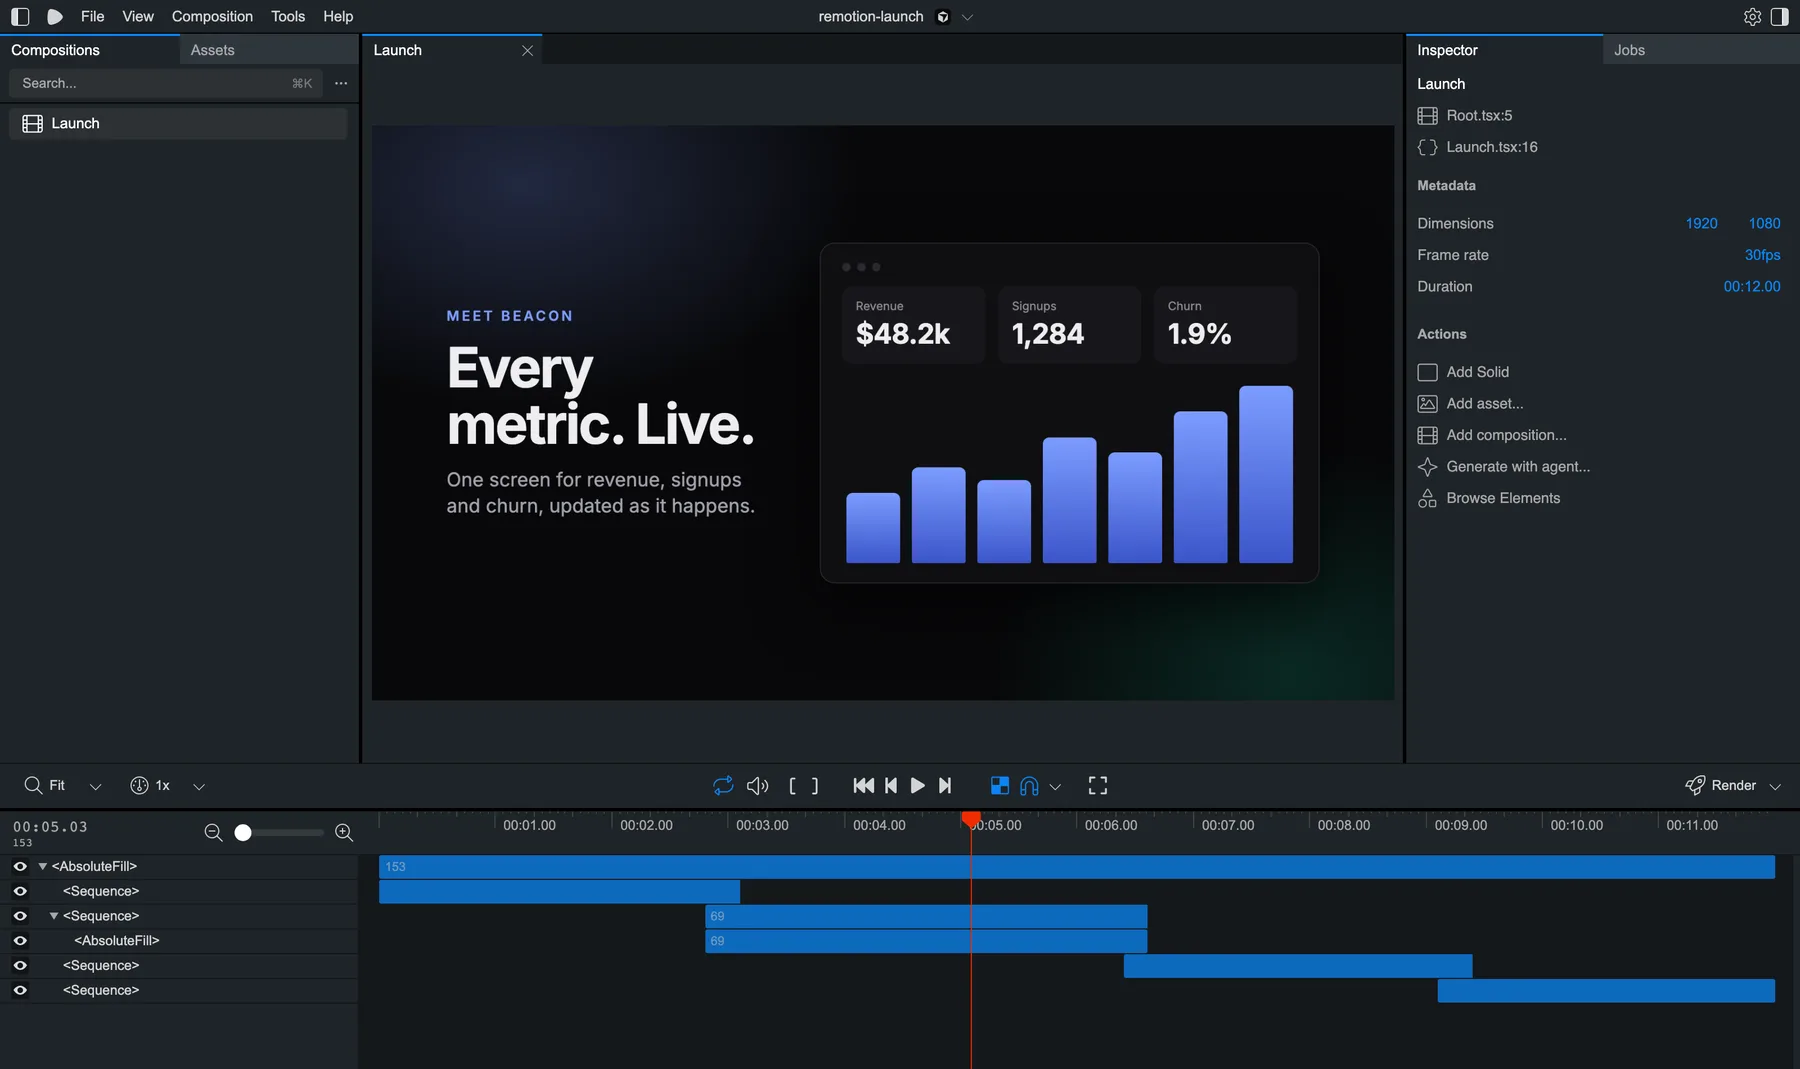
The timeline shows each <Sequence> as a bar, overlapping where we asked for the cross-fade, and the inspector confirms the composition: 1920 by 1080, 30 fps, 12 seconds. Scrub to any frame. If the preview stutters on a heavy scene, that does not carry over to the file: a render takes as long as it needs for each frame.
Step 12: render a still, then the video
Check single frames before you render the whole video. A still renders one frame of one composition:
npx remotion still src/index.ts Launch out/frame-144.png --frame=144
Composition          Launch
Format               png
Output               out/frame-144.png
Rendered 1/1
+                    out/frame-144.png
These are the images in the steps above. Pick frames inside each scene, not at its first frame. Then render the video:
npx remotion render src/index.ts Launch out/beacon.mp4
Rendered 360/360
Encoded 360/360
+                    out/beacon.mp4 1 MB
Verify the file instead of trusting the summary:
ffprobe -v error -show_entries stream=codec_name,width,height,r_frame_rate,duration -of default=nw=1 out/beacon.mp4
codec_name=h264
width=1920
height=1080
r_frame_rate=30/1
duration=12.000000
An H.264 file, 1920 by 1080, 30 fps, exactly 12 seconds. On an Apple M4 Pro the render took about 7.4 seconds.
When something goes wrong
Four failures account for most of the pain people report, and each has its own answer:
- A render times out or hangs. See what
delayRender() was called but not clearedmeans and why a render is stuck. - Text looks soft on a high density screen. See blurry text in exported video. The fix is usually
--scale=2, not a lower CRF. - Rendering is slow. See why Remotion is slow and why more concurrency can make it worse.
- The licence. Free up to three people, per-render pricing above that. See whether you need a Company License.
Where to go next
- Compare it with HyperFrames. The same video in HyperFrames is plain HTML and GSAP, with a timeline you register instead of a function of the frame.
- Decide whether Remotion fits the job. Is Remotion worth it for SaaS feature and launch videos? is an honest read on when to stay and when to move.
- Move a composition across. How to port a Remotion composition to HyperFrames covers the skill that does it and what it refuses to translate.
The same launch video, without writing the components
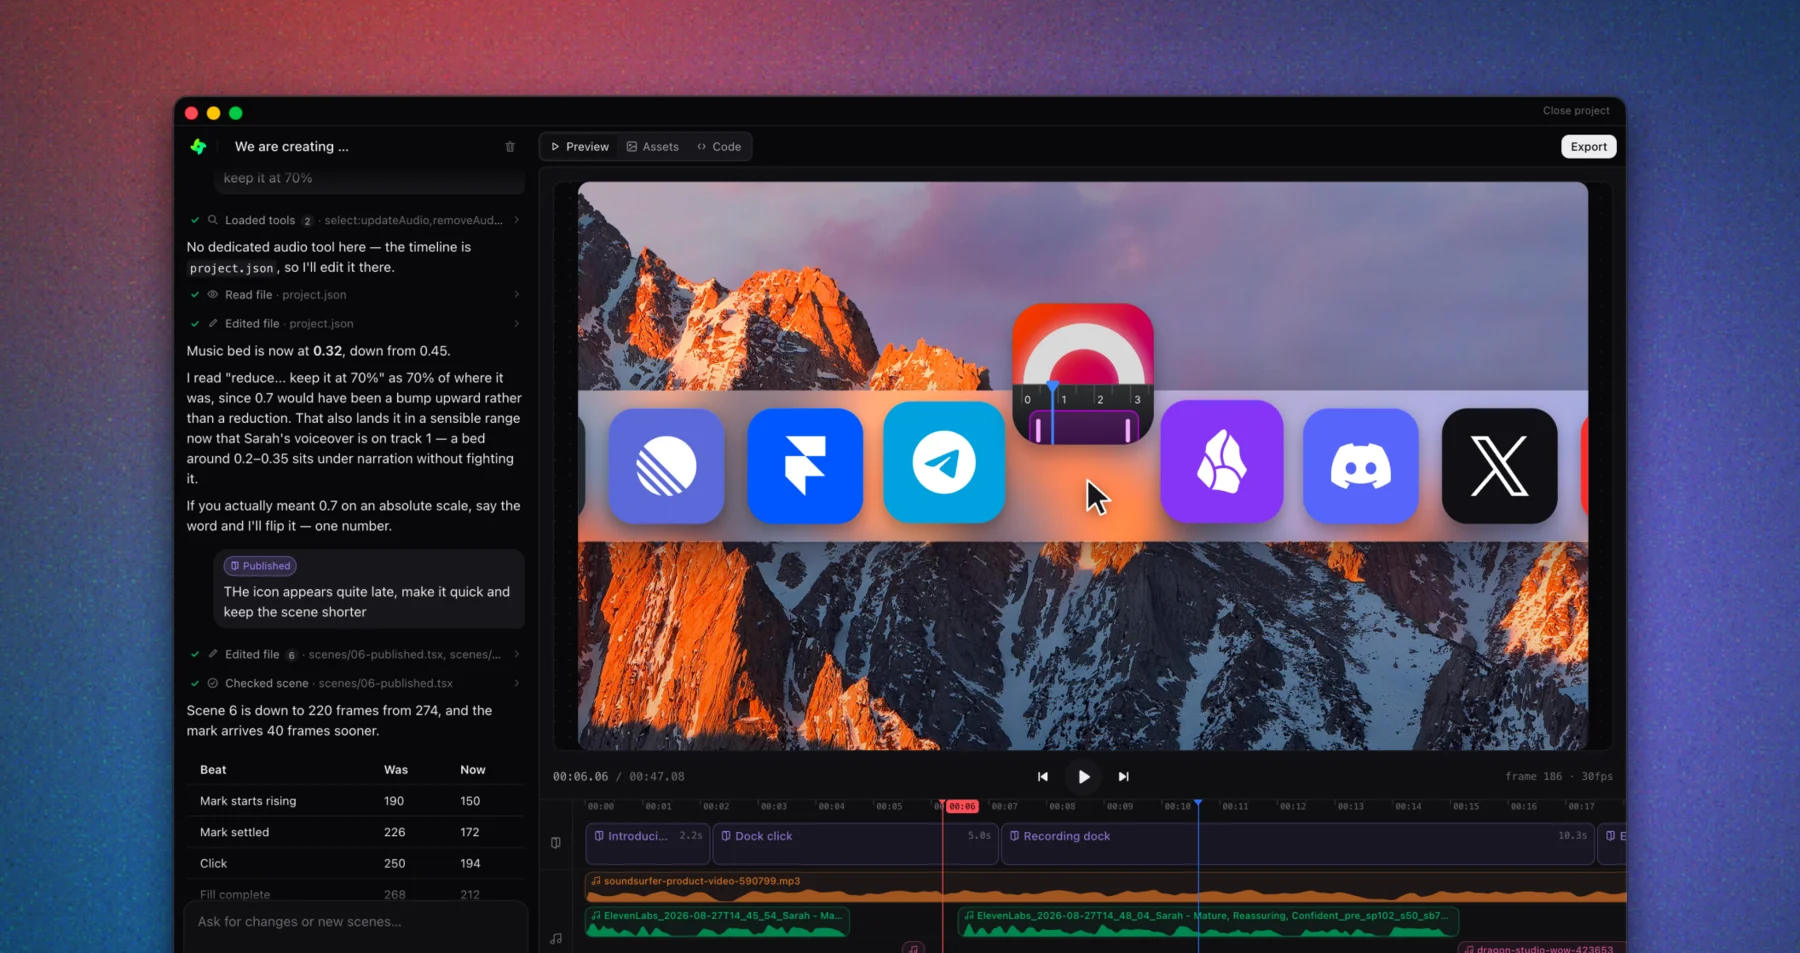
If video is a feature of your product, building it in React is the right call and Remotion is a good tool for it. If you are making a launch video, a feature announcement or an explainer a few times a quarter, the hours above are better spent on the message. GenMotion Studio takes a description, builds the scenes, and lets you refine them in a live preview before you export. It is free to start, with no watermark, and exports render on your own machine. See how it compares.
Related answers
How to create a product launch video with HyperFrames
Build a 12 second, four scene product launch video from an empty folder with HyperFrames: the project layout, every file, the check and snapshot commands, a real render, and the mistakes the linter catches. Tested on HyperFrames 0.8.134.
Do I need a Remotion Company License, and what counts as a render?
Free for teams of up to three people. At four or more you need a Company License, and if you automate rendering you need the per-render Automators plan, with a $100 monthly minimum. Stills count as renders. Studio previews do not.
What does 'A delayRender() was called but not cleared after 28000ms' mean in Remotion?
Remotion waited for something to finish before capturing a frame and gave up after about 30 seconds. The causes, in order of how often they bite: continueRender never called, blocked network, too much concurrency, a large OffthreadVideo, rate-limited remote assets.
Why is the text in my Remotion video blurry, and how do I render it crisp?
Soft text in an exported Remotion video is usually a pixel-density problem, not a compression one. Use output scaling, then CRF, then check JPEG quality, colour space and the codec. With the CRF defaults for every codec.
Why is my Remotion render slow, and why does more concurrency make it worse?
Concurrency is not a dial you turn up. Too high and too low are both slow. Remotion's own performance guide, in order: video tag, concurrency benchmark, GPU effects, slow JavaScript, data fetching, codec, resolution, and Lambda.
Sources
- Remotion: create-video
- Remotion: Sequence
- Remotion: interpolate()
- Remotion: Using fonts
- Remotion: Performance tips
- Remotion: License FAQ
This answer as plain Markdown, for agents: /answers/how-to-create-a-product-launch-video-with-remotion.md