# How to create a product launch video with Remotion
Build a 12 second, four scene product launch video in Remotion: scaffold, fonts, one React component per scene, Studio, stills and a real render. Every file and command was run on Remotion 4.0.533.
A launch video has to get a stranger to understand what your product does in about ten seconds. This tutorial builds one from an empty folder with [Remotion](https://www.remotion.dev), the React framework for making video in code. You will write every file, run the real commands and end with a rendered MP4.
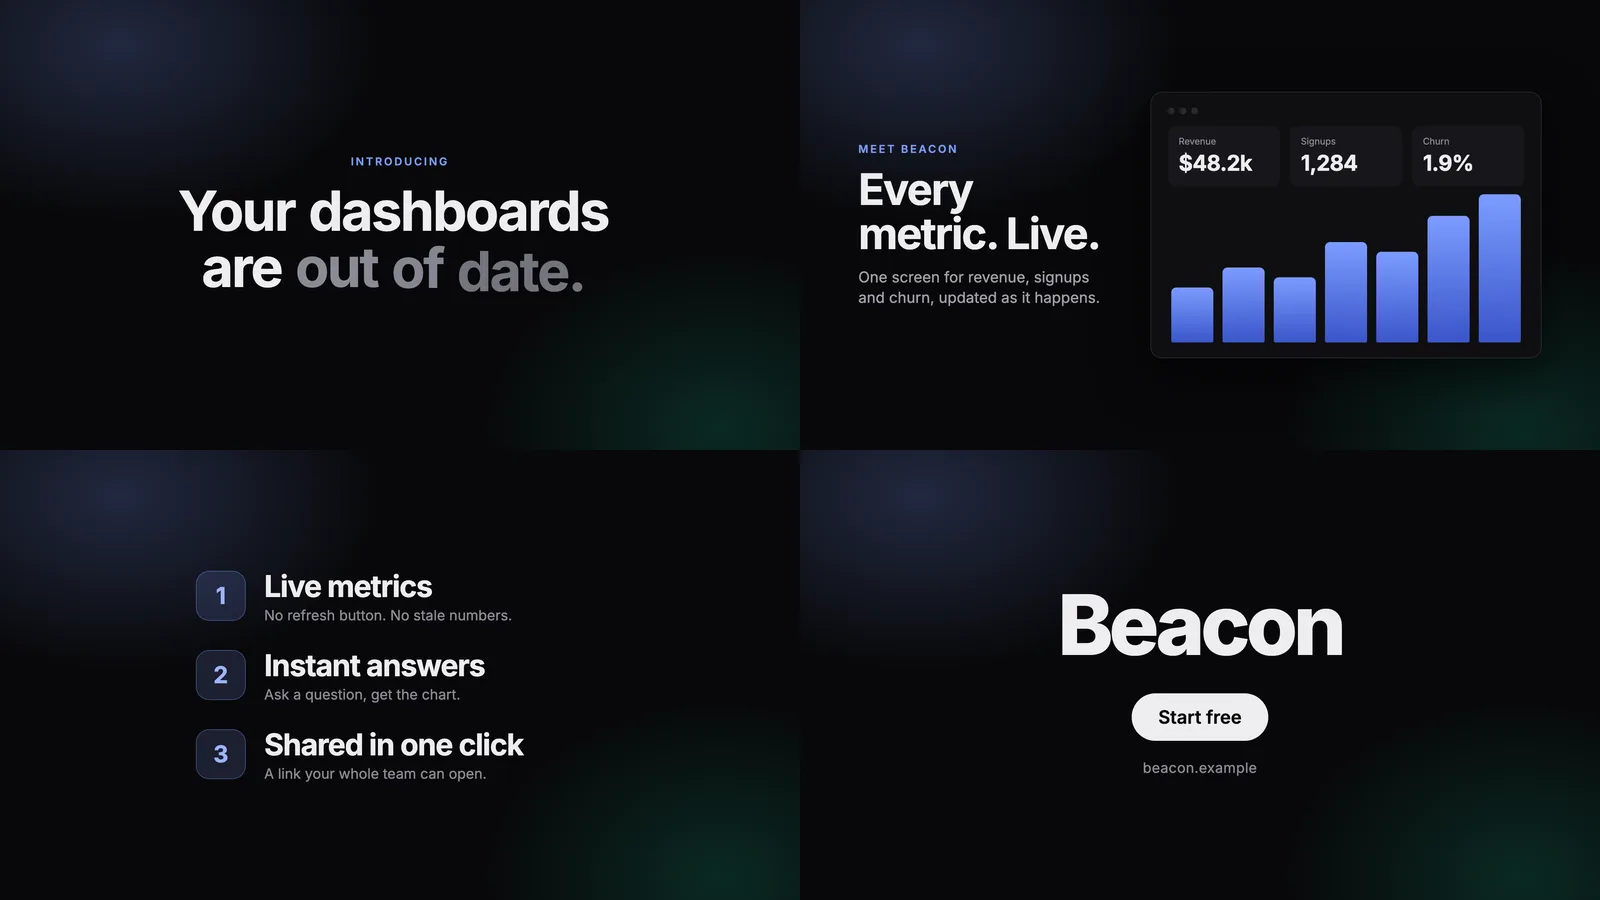
Everything below was run on **Remotion 4.0.533** with Node.js 22, on a Mac. The product, Beacon, is made up, and the video needs no images or footage: every visual is a React component. It is the same video as in [the HyperFrames version of this tutorial](/answers/how-to-create-a-product-launch-video-with-hyperframes), so you can compare the two approaches directly.
## What you need
- **Node.js 22 or newer.**
- A terminal and a code editor. React knowledge helps; the components here are plain function components with inline styles.
Remotion downloads the browser it renders with, so there is nothing else to install.
## Step 1: plan four scenes
Decide the scenes first, because the code mirrors them. Remotion measures time in **frames**, so write the plan in both units. At 30 frames per second:
| Scene | Starts at | Length | What it says |
| --- | --- | --- | --- |
| Hook | frame 0 (0.0s) | 93 frames (3.1s) | "Your dashboards are out of date." |
| Reveal | frame 84 (2.8s) | 114 frames (3.8s) | "Every metric. Live." beside the product |
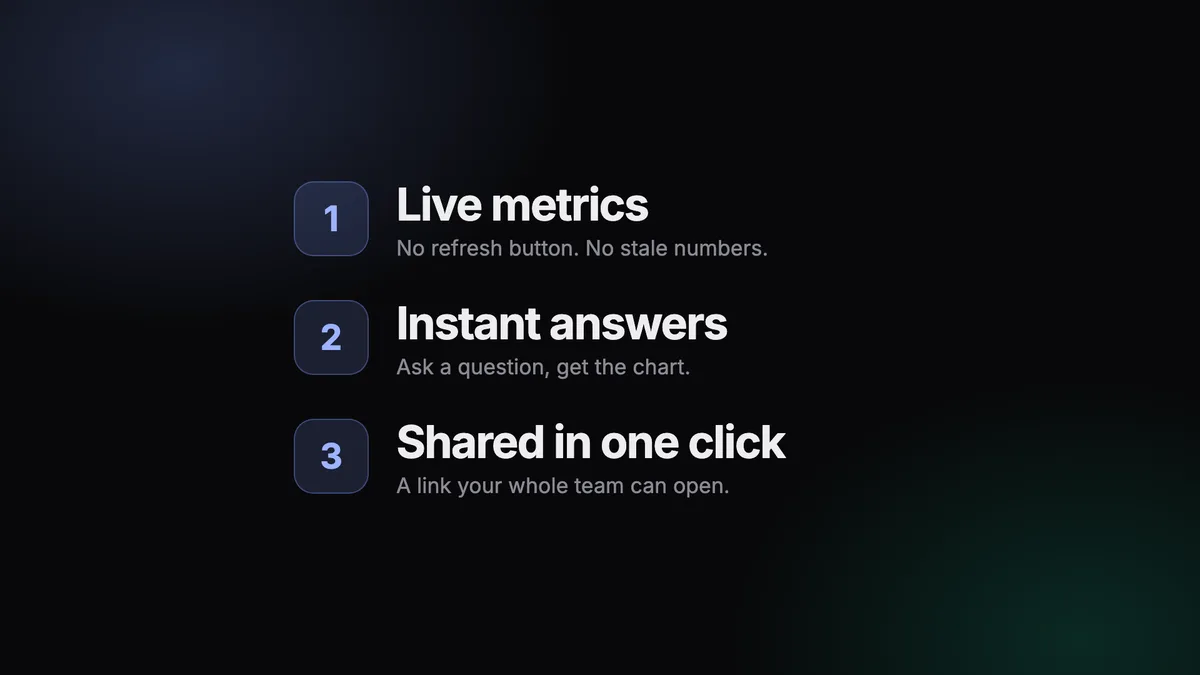
| Features | frame 192 (6.4s) | 90 frames (3.0s) | Three short promises |
| Call to action | frame 273 (9.1s) | 87 frames (2.9s) | "Beacon. Start free." |
Each scene overlaps the next by 9 frames (0.3 seconds) so they cross-fade. The whole video is 360 frames, 12 seconds. For the content side, see [what makes a good launch video](/blog/what-makes-a-good-launch-video).
## Step 2: create the project
```bash
npx create-video@latest --yes --blank --no-tailwind remotion-launch
cd remotion-launch
```
`--yes` makes it non-interactive, `--blank` picks the empty template, and `--no-tailwind` skips the Tailwind setup. It installs dependencies and finishes with:
```text
Copied to remotion-launch.
Get started by running:
cd remotion-launch
npm run dev
To render a video, run:
npx remotion render
Remotion is free for teams of up to 3.
Adopting Remotion in your company? Visit https://www.remotion.pro/license
```
The blank template has `src/index.ts` (which calls `registerRoot()`), `src/Root.tsx` and a placeholder composition. We will replace the placeholder.
## Step 3: load the font
Install Remotion's Google Fonts package. Keep it on the same version as the rest of Remotion; here that is 4.0.533:
```bash
npm i @remotion/google-fonts@4.0.533
```
Then create `src/theme.ts`. It loads Inter once, in one module, and holds the colours and the two animation helpers every scene uses:
```ts
import { loadFont } from "@remotion/google-fonts/Inter";
import { Easing, interpolate } from "remotion";
// Load one weight range, once, in one module. Remotion waits for the font
// before it captures a frame, so there is nothing to delayRender yourself.
export const { fontFamily } = loadFont("normal", {
weights: ["400", "600", "700", "800"],
subsets: ["latin"],
});
export const colors = {
bg: "#08080a",
text: "#ededef",
muted: "#8b8b95",
accent: "#7c9cff",
};
/** 0 to 1 over `duration` frames starting at `start`, eased out. */
export const enter = (frame: number, start: number, duration: number) =>
interpolate(frame, [start, start + duration], [0, 1], {
extrapolateLeft: "clamp",
extrapolateRight: "clamp",
easing: Easing.out(Easing.cubic),
});
/** 1 until the last `fade` frames of a scene, then 0. */
export const fadeOut = (frame: number, durationInFrames: number, fade = 9) =>
interpolate(frame, [durationInFrames - fade, durationInFrames], [1, 0], {
extrapolateLeft: "clamp",
extrapolateRight: "clamp",
});
```
`loadFont()` blocks the render until the font is ready, so you do not need to call `delayRender()` yourself. `enter()` turns a frame number into a 0 to 1 progress with easing, and `fadeOut()` does the same for the last few frames of a scene. Everything is built from `interpolate()`.
## Step 4: register the composition
Replace `src/Root.tsx` with a single composition that fixes the canvas: 1920 by 1080, 30 fps, 360 frames. Delete the template's `src/Composition.tsx`.
```tsx
import { Composition } from "remotion";
import { Launch } from "./Launch";
export const RemotionRoot: React.FC = () => (
);
```
## Step 5: assemble the scenes, `src/Launch.tsx`
`Launch` paints the background and places each scene with a ``. Inside a sequence, `useCurrentFrame()` starts at **zero** when the sequence starts, so each scene animates against its own local time.
```tsx
import { AbsoluteFill, Sequence } from "remotion";
import { colors, fontFamily } from "./theme";
import { Features } from "./scenes/Features";
import { Intro } from "./scenes/Intro";
import { Outro } from "./scenes/Outro";
import { Reveal } from "./scenes/Reveal";
// 30 fps. Each scene overlaps the next by 9 frames (0.3s) so the fades cross.
const SCENES = {
intro: { from: 0, duration: 93 },
reveal: { from: 84, duration: 114 },
features: { from: 192, duration: 90 },
outro: { from: 273, duration: 87 },
} as const;
export const Launch: React.FC = () => (
);
```
All four timing values live in the `SCENES` table. To make the hook a second longer, change one number here rather than editing animation code in the scene.
## Step 6: the hook, `src/scenes/Intro.tsx`
```tsx
import { AbsoluteFill, useCurrentFrame } from "remotion";
import { colors, enter, fadeOut } from "../theme";
// Two lines, so the break is data rather than a in the middle of the animation.
const LINES = [
[{ text: "Your" }, { text: "dashboards" }],
[{ text: "are" }, { text: "out", muted: true }, { text: "of", muted: true }, { text: "date.", muted: true }],
];
export const Intro: React.FC<{ durationInFrames: number }> = ({ durationInFrames }) => {
const frame = useCurrentFrame(); // local to this : 0 at the scene's first frame
const label = enter(frame, 3, 15);
let index = 0; // running word number across both lines, for the stagger
return (
Introducing
{LINES.map((line, l) => (
{line.map((word) => {
const p = enter(frame, 8 + index++ * 4, 18); // 4 frames between words
return (
{word.text}
);
})}
))}
);
};
```
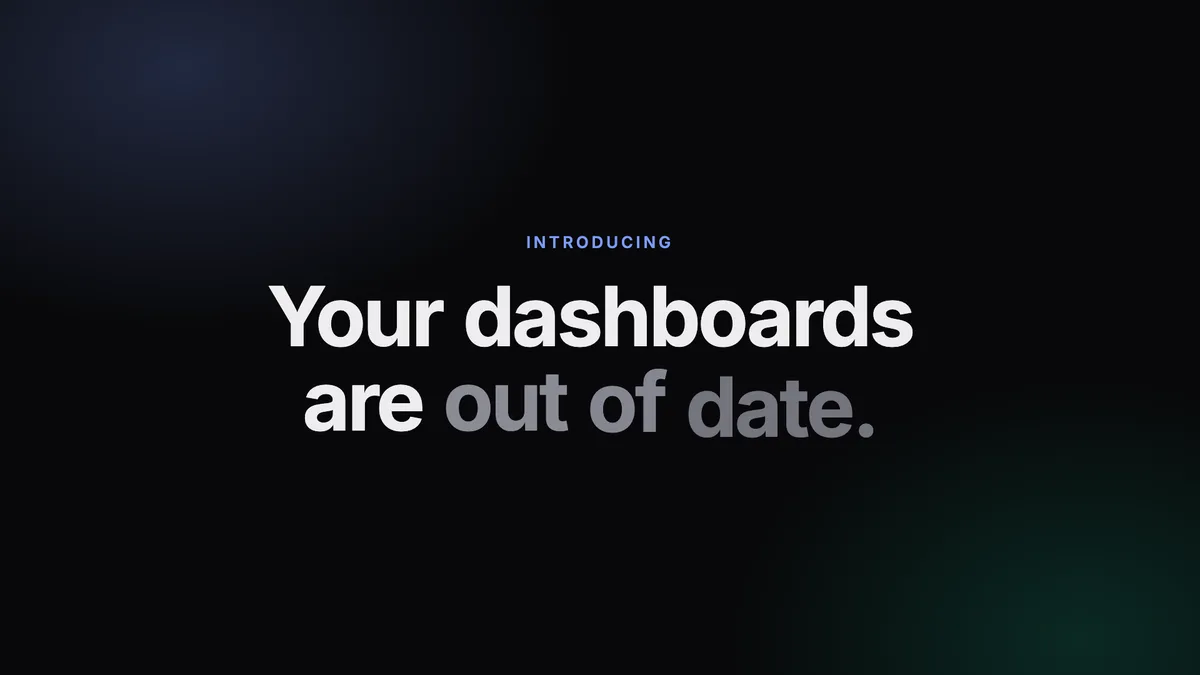
Notice that nothing here uses a timer, `Date.now()` or CSS transitions. Every value is a pure function of `frame`: given frame 36, the component always draws the same picture. That is what makes Remotion renders reproducible, and it is why the word stagger is written as arithmetic (`8 + index * 4` frames) rather than as a delay. See [why a render can differ from its preview](/answers/why-does-my-render-look-different-from-the-preview) for the principle.
## Step 7: the reveal, `src/scenes/Reveal.tsx`
The longest scene: copy on the left, a dashboard built from plain `div` elements on the right, KPI tiles that rise in, and bars that grow from the baseline.
```tsx
import { AbsoluteFill, Easing, interpolate, useCurrentFrame } from "remotion";
import { colors, enter, fadeOut } from "../theme";
const KPIS = [
{ label: "Revenue", value: "$48.2k" },
{ label: "Signups", value: "1,284" },
{ label: "Churn", value: "1.9%" },
];
const BARS = [38, 52, 45, 68, 60, 82, 96];
export const Reveal: React.FC<{ durationInFrames: number }> = ({ durationInFrames }) => {
const frame = useCurrentFrame();
const dash = enter(frame, 12, 24);
return (
{[
Meet Beacon
,
Every metric. Live.
,
One screen for revenue, signups and churn, updated as it happens.
,
].map((el, i) => {
const p = enter(frame, 6 + i * 4, 18);
return (
{el}
);
})}
{[0, 1, 2].map((d) => (
))}
{KPIS.map((k, i) => {
const p = enter(frame, 27 + i * 3, 15);
return (
);
};
```
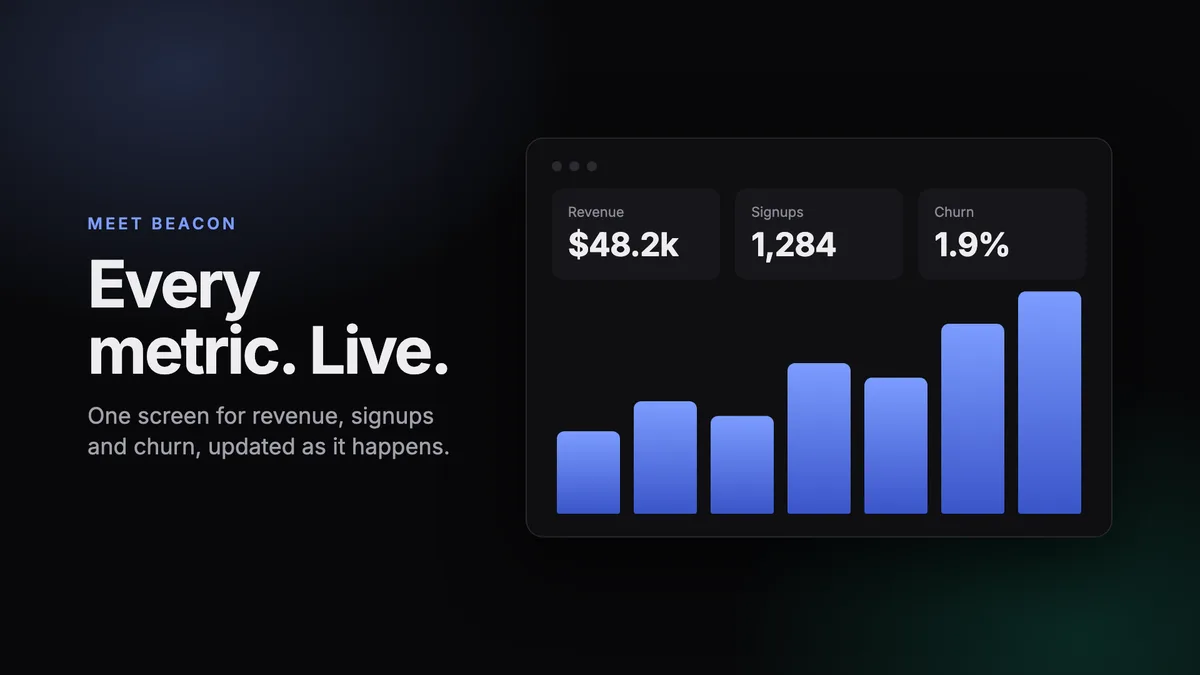
The bars animate `scaleY` from the baseline rather than `height`, which keeps layout out of the animation, and use `Easing.back` for the small overshoot at the top of the move.
> **Would you rather describe this than write it?**
>
> The five components above are the part of a launch video that takes the time: layout, timing and easing for every element. GenMotion does not make Remotion projects. It builds videos as HyperFrames or Three.js projects instead: you describe the video, the agent writes the scenes, and you scrub and adjust them in a frame-accurate preview before exporting the MP4 on your own machine.
>
> Prompt:
>
> Make a 12 second product launch video for Beacon, a real-time analytics dashboard. Four scenes. First, a hook: "Your dashboards are out of date." Second, a reveal: "Every metric. Live." beside a dashboard with three KPI tiles and a bar chart that grows in. Third, three features: live metrics, instant answers, shared in one click. Fourth, a closing card with the name Beacon and a "Start free" button. Dark background, indigo accent, clean modern type.
## Step 8: the features, `src/scenes/Features.tsx`
```tsx
import { AbsoluteFill, useCurrentFrame } from "remotion";
import { colors, enter, fadeOut } from "../theme";
const ROWS = [
{ n: "1", title: "Live metrics", sub: "No refresh button. No stale numbers." },
{ n: "2", title: "Instant answers", sub: "Ask a question, get the chart." },
{ n: "3", title: "Shared in one click", sub: "A link your whole team can open." },
];
export const Features: React.FC<{ durationInFrames: number }> = ({ durationInFrames }) => {
const frame = useCurrentFrame();
return (
{ROWS.map((r, i) => {
const p = enter(frame, 6 + i * 10, 18); // a row every 10 frames
return (
{r.n}
{r.title}
{r.sub}
);
})}
);
};
```
## Step 9: the call to action, `src/scenes/Outro.tsx`
```tsx
import { AbsoluteFill, useCurrentFrame } from "remotion";
import { colors, enter } from "../theme";
export const Outro: React.FC = () => {
const frame = useCurrentFrame();
const brand = enter(frame, 6, 21);
const cta = enter(frame, 24, 15);
const url = enter(frame, 33, 15);
return (
Beacon
Start free
beacon.example
);
};
```
The last scene takes no `durationInFrames` and has no fade-out: it is the end of the video, so it simply holds.

## Step 10: typecheck
```bash
npx tsc --noEmit
```
No output means no errors. The template also has `npm run lint`, which runs ESLint and `tsc` together. Typechecking matters more in video than it looks: a misspelled prop in a scene you only reach at second nine is a failure you would otherwise find at the end of a render.
## Step 11: preview in Remotion Studio
```bash
npm run dev
```
This runs `remotion studio` and opens it in your browser.
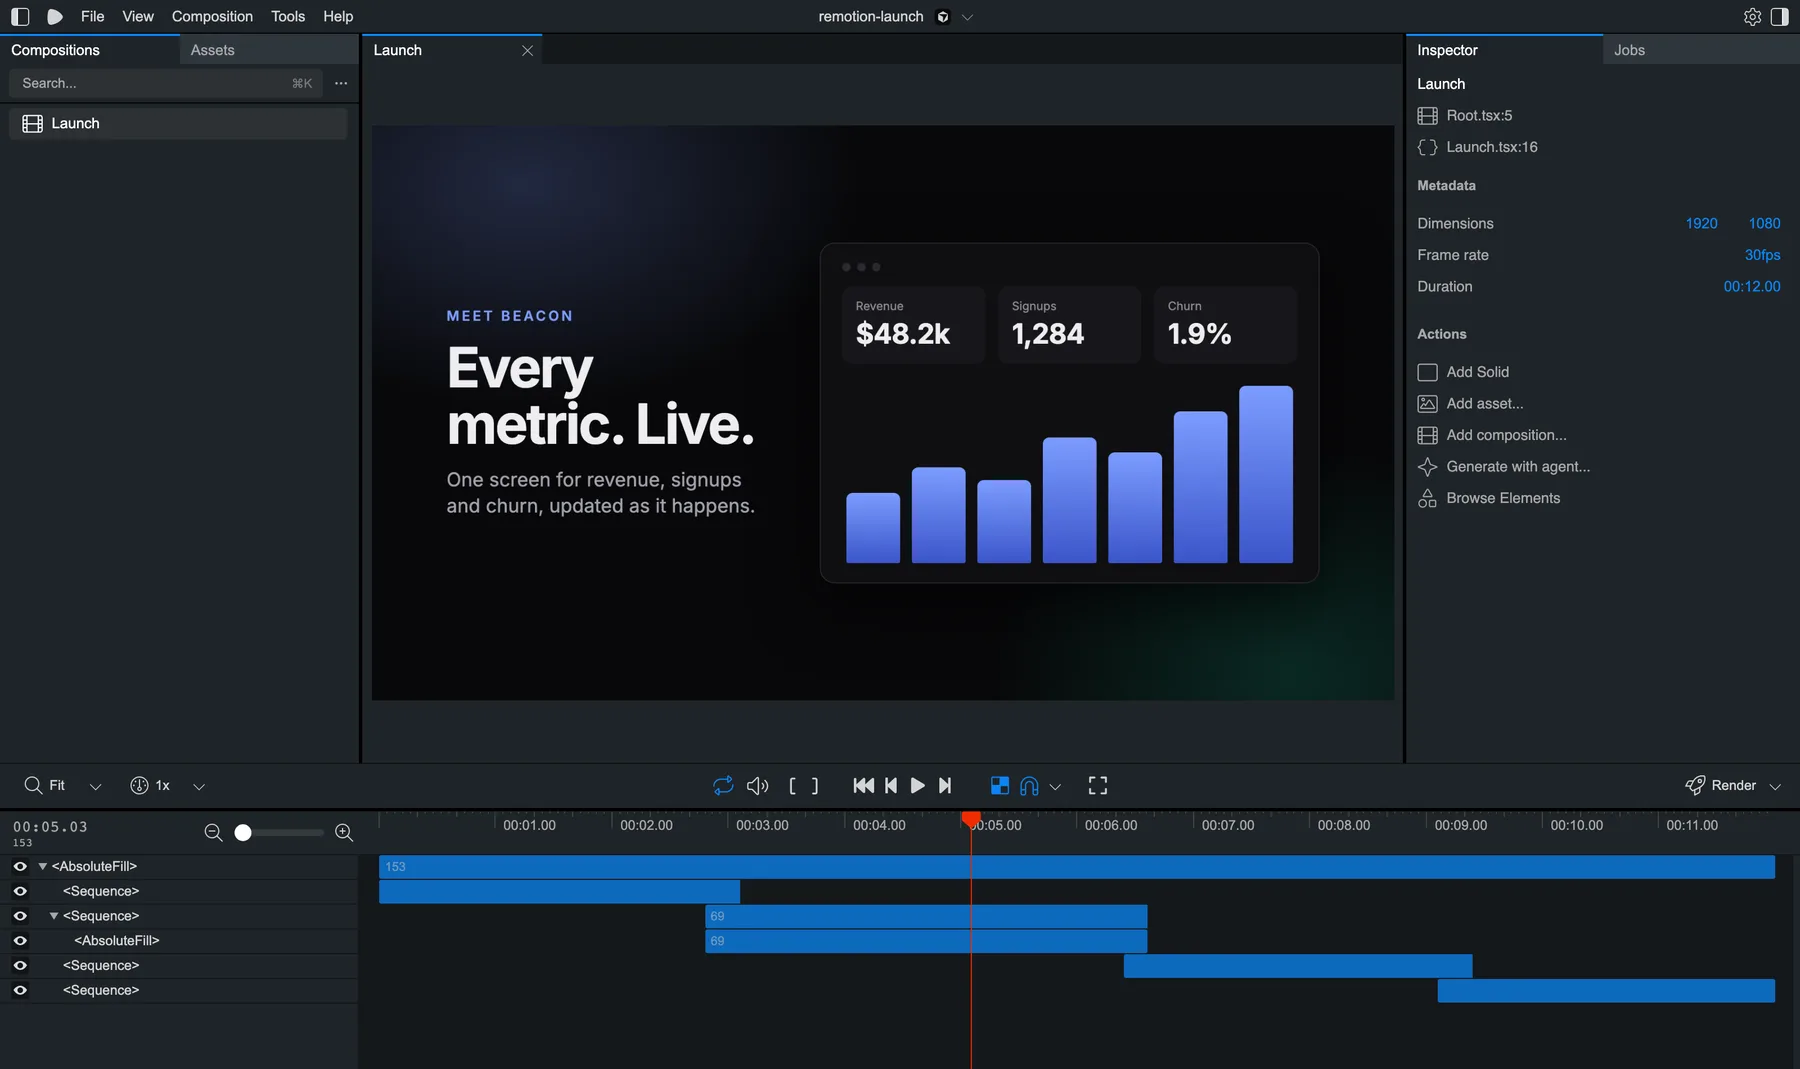
The timeline shows each `` as a bar, overlapping where we asked for the cross-fade, and the inspector confirms the composition: 1920 by 1080, 30 fps, 12 seconds. Scrub to any frame. If the preview stutters on a heavy scene, that does not carry over to the file: a render takes as long as it needs for each frame.
## Step 12: render a still, then the video
Check single frames before you render the whole video. A still renders one frame of one composition:
```bash
npx remotion still src/index.ts Launch out/frame-144.png --frame=144
```
```text
Composition Launch
Format png
Output out/frame-144.png
Rendered 1/1
+ out/frame-144.png
```
These are the images in the steps above. Pick frames **inside** each scene, not at its first frame. Then render the video:
```bash
npx remotion render src/index.ts Launch out/beacon.mp4
```
```text
Rendered 360/360
Encoded 360/360
+ out/beacon.mp4 1 MB
```
Verify the file instead of trusting the summary:
```bash
ffprobe -v error -show_entries stream=codec_name,width,height,r_frame_rate,duration -of default=nw=1 out/beacon.mp4
```
```text
codec_name=h264
width=1920
height=1080
r_frame_rate=30/1
duration=12.000000
```
An H.264 file, 1920 by 1080, 30 fps, exactly 12 seconds. On an Apple M4 Pro the render took about 7.4 seconds.
## When something goes wrong
Four failures account for most of the pain people report, and each has its own answer:
- **A render times out or hangs.** See [what `delayRender() was called but not cleared` means](/answers/remotion-delayrender-was-called-but-not-cleared) and [why a render is stuck](/answers/remotion-render-stuck).
- **Text looks soft on a high density screen.** See [blurry text in exported video](/answers/remotion-blurry-text-in-exported-video). The fix is usually `--scale=2`, not a lower CRF.
- **Rendering is slow.** See [why Remotion is slow and why more concurrency can make it worse](/answers/remotion-render-is-slow).
- **The licence.** Free up to three people, per-render pricing above that. See [whether you need a Company License](/answers/remotion-do-i-need-a-company-license).
## Where to go next
- **Compare it with HyperFrames.** [The same video in HyperFrames](/answers/how-to-create-a-product-launch-video-with-hyperframes) is plain HTML and GSAP, with a timeline you register instead of a function of the frame.
- **Decide whether Remotion fits the job.** [Is Remotion worth it for SaaS feature and launch videos?](/answers/is-remotion-worth-it-for-saas-feature-videos) is an honest read on when to stay and when to move.
- **Move a composition across.** [How to port a Remotion composition to HyperFrames](/answers/port-remotion-to-hyperframes) covers the skill that does it and what it refuses to translate.
## The same launch video, without writing the components
If video is a feature of your product, building it in React is the right call and Remotion is a good tool for it. If you are making a launch video, a feature announcement or an explainer a few times a quarter, the hours above are better spent on the message. GenMotion Studio takes a description, builds the scenes, and lets you refine them in a live preview before you export. It is free to start, with no watermark, and exports render on your own machine. [See how it compares](/blog/remotion-alternatives).
## Related
- [How to create a product launch video with HyperFrames](https://genmotion.dev/answers/how-to-create-a-product-launch-video-with-hyperframes)
- [Do I need a Remotion Company License, and what counts as a render?](https://genmotion.dev/answers/remotion-do-i-need-a-company-license)
- [What does 'A delayRender() was called but not cleared after 28000ms' mean in Remotion?](https://genmotion.dev/answers/remotion-delayrender-was-called-but-not-cleared)
- [Why is the text in my Remotion video blurry, and how do I render it crisp?](https://genmotion.dev/answers/remotion-blurry-text-in-exported-video)
- [Why is my Remotion render slow, and why does more concurrency make it worse?](https://genmotion.dev/answers/remotion-render-is-slow)
## FAQ
### Do I need a Remotion licence to follow this?
Not to follow it. Remotion is free for individuals and for teams of up to three people, and the create-video command prints that when it finishes. A company of four or more needs a Company License, and if you automate rendering you need the per-render Automators plan. Stills count as renders and Studio previews do not. The details are in the licence answer linked below.
### How long did the render take?
On an Apple M4 Pro, npx remotion render for this 360 frame, 1920 by 1080 video took about 7.4 seconds and produced a 1 MB H.264 file. A single npx remotion still took about 15 seconds the first time, which includes bundling the project. Timings depend on the machine and on how heavy the effects are.
### Why is each scene its own component?
Inside a Sequence, useCurrentFrame() returns a frame number that starts at zero when the sequence starts. That makes each scene a self contained function of its own local time, so you can re-time a scene by changing one number in the parent without touching the animation code inside it.
### How do I make this vertical?
Change width and height on the Composition to 1080 and 1920 and rework the layouts, which here assume a 16:9 frame. Because the scenes are React components, you can also pass the layout direction in as a prop and share the animation code.
## Sources
- [Remotion: create-video](https://www.remotion.dev/docs/cli/create-video)
- [Remotion: Sequence](https://www.remotion.dev/docs/sequence)
- [Remotion: interpolate()](https://www.remotion.dev/docs/interpolate)
- [Remotion: Using fonts](https://www.remotion.dev/docs/fonts)
- [Remotion: Performance tips](https://www.remotion.dev/docs/performance)
- [Remotion: License FAQ](https://www.remotion.dev/docs/license/faq)
Canonical: https://genmotion.dev/answers/how-to-create-a-product-launch-video-with-remotion